Descaling Gaggia Classic Pro: The Right Way
Descaling your Gaggia Classic Pro espresso machine is a crucial maintenance task that ensures your beloved coffee maker continues to produce delicious, high-quality espresso.
Over time, mineral deposits from water, known as scale, can build up within the machine, affecting its performance and the taste of your coffee. Descaling is the process of removing these deposits, keeping your espresso machine in top condition for excellent brews.
In this guide, I’ll walk you through the step-by-step process of descaling your Gaggia Classic Pro.
Signs Your Gaggia Classic Pro Needs Descaling
Sometimes, your Gaggia Classic Pro might drop hints that it’s due for a descaling. These subtle signs are like your machine’s way of saying, “Hey, give me a little TLC.” Paying attention to these indicators can save you from those less-than-stellar espresso mornings.
Flavor Flatline: The first sign is a noticeable drop in the flavor of your espresso. If your brew starts to taste a bit off, with a hint of bitterness or an absence of that familiar richness, limescale might be the culprit. Limescale interferes with water temperature, leading to suboptimal extraction and flavor.
Crema Conundrum: Your espresso’s crema, that delightful golden froth atop your shot, should be velvety and thick. When limescale takes over, it can impact the pressure, leading to a lackluster crema. If your espresso resembles a sad, thin layer, it’s a sure sign of limescale issues.
Slow Shots: A properly functioning Gaggia Classic Pro delivers a shot of espresso in around 25-30 seconds. If your shots are taking significantly longer to pour, you’re likely dealing with limescale buildup. It’s like your machine is sipping its espresso, which is charming for you but a headache for your coffee.
Dreaded Drips: When your Gaggia Classic Pro starts dripping or leaking, it’s a sign to take notice. Limescale can cause blockages in the machine’s inner workings, leading to these frustrating issues.
Unusual Noises: Listen to your machine. If you notice unusual sounds like gurgling, hissing, or spluttering, it’s time to consider descaling. These sounds can be linked to the limescale’s interference with the boiler and pump’s performance.
So, if you’ve spotted any of these signs in your daily coffee routine, it’s a clear indication that your Gaggia Classic Pro is in need of some descaling love. Don’t worry; in the next section, we’ll guide you through the steps of descaling with ease and confidence. Your espresso’s flavor and crema will thank you!
Tools and Materials Needed To Descaling Gaggia Classic Pro
Before we dive into the descaling process, let’s make sure you have all the tools and materials you need to get the job done. Here’s a checklist to ensure a smooth descaling operation:
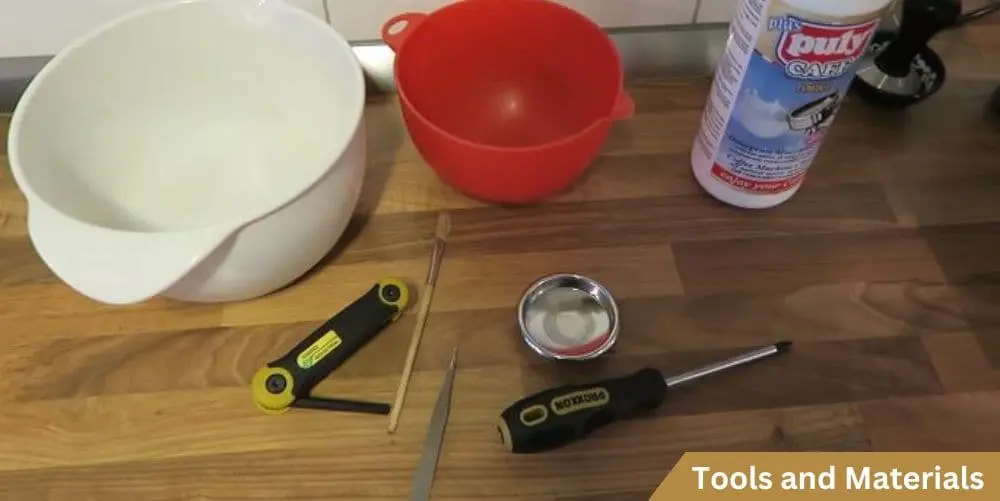
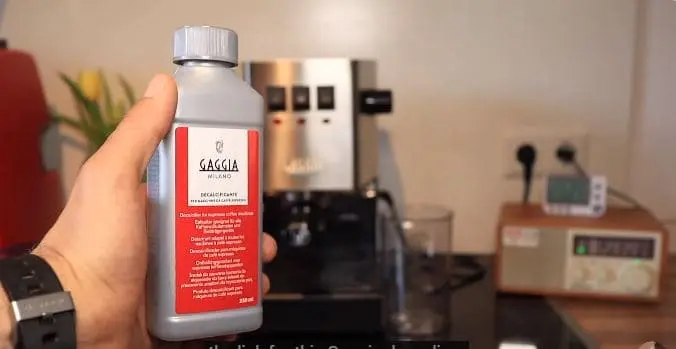
Gaggia Decalcifier Descaler Solution
The Gaggia Decalcifier Descaler Solution arrives in a 250ml bottle, providing enough solution for multiple descaling sessions. Tailored explicitly for super and semi-automatic machines, this solution is formulated to effectively eliminate scale buildup and calcium deposits, safeguarding the longevity and functionality of your Gaggia espresso machine.
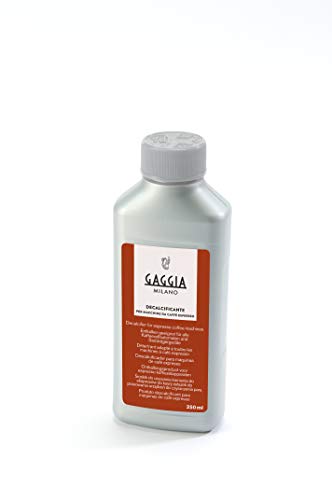
Choosing the Gaggia Decalcifier Descaler Solution is a prudent decision for Gaggia espresso machine owners seeking a reliable and Gaggia-approved descaling solution. Its safety, effectiveness, and the brand endorsement instill trust in its ability to maintain the performance and longevity of your machine. The ease of application further enhances its appeal, ensuring a seamless descaling process without compromising on results.
- Fresh Water: You’ll need plenty of fresh, clean water. Make sure your water tank is filled and ready for rinsing.
- A Container: Have a container ready to catch the descaling solution as it flows through your machine. This will prevent any mess and make the process more manageable.
- A Screwdriver: You may need a screwdriver to access specific parts of your Gaggia Classic Pro, such as the shower screen or water dispersion disc. This step might not be necessary for everyone, but it’s good to have one on hand just in case.
- A Towel or Cloth: Keep a clean towel or cloth nearby for wiping down any spills or drips. It’s a simple but often overlooked tool to maintain cleanliness during the process.
Once you’ve gathered all the necessary tools and materials, you’ll be well-prepared to embark on your descaling journey. In the upcoming sections, we’ll walk you through the step-by-step process of descaling your Gaggia Classic Pro, ensuring it runs smoothly and your espresso tastes as good as ever.
Descaling Gaggia Classic Pro: Step-by-Step Guide
You’ve got your descaling solution, water, and all the tools ready. I’ll guide you through each step, making the descaling process as simple as enjoying your morning espresso:
Preparation
- Start by ensuring your Gaggia Classic Pro is turned off and unplugged. Safety first!
- Remove the water reservoir and the drip tray. Make sure your water tank is completely empty.
Mix the Descaling Solution
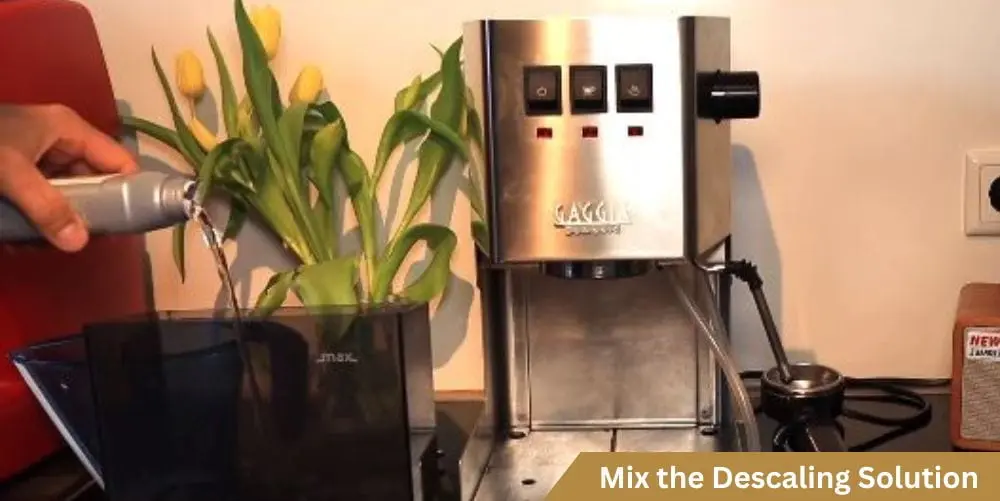
- Refer to the manufacturer’s instructions on the descaling solution label for the proper dilution ratio.
- Generally, it’s a 1:1 ratio (equal parts solution and water). Pour the solution into the water tank.
Reattach the Water Tank
- Once you’ve filled the tank with the descaling solution, securely reattach it to your Gaggia Classic Pro.
Position a Container
- Place a container under the group head. This container will catch the descaling solution as it flows through your machine.
Turn On Your Machine
- Now, turn on your Gaggia Classic Pro and allow it to heat up as you would when making espresso. We’re getting ready for the descaling process.
Clean the Steam Wand
- As your machine heats up, run a bit of the descaling solution through the steam wand. This step cleans it and ensures it’s free from limescale.
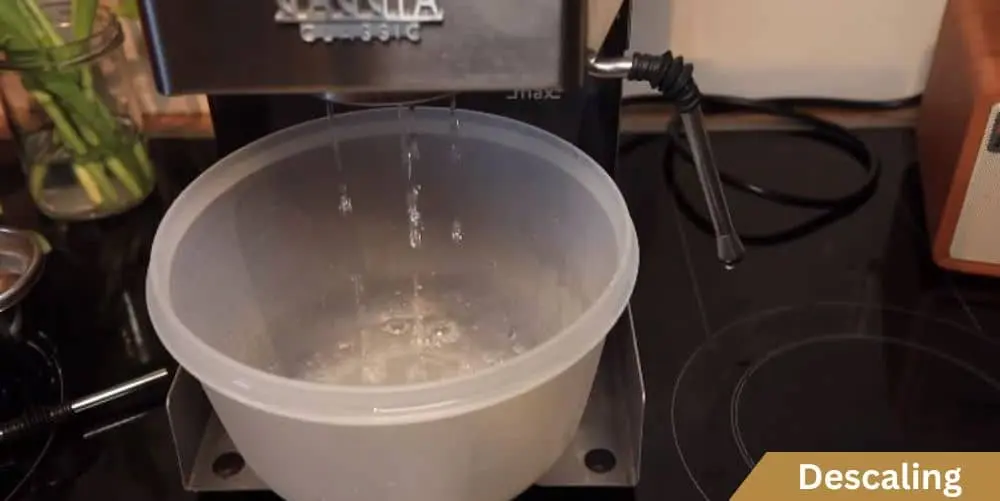
Start Descaling
- Here’s the heart of the operation: we’re going to start descaling. Activate the pump, as if you’re pulling a shot, but without coffee in the portafilter. Let the descaling solution flow.
Pause and Repeat
- As the descaling solution moves through the machine, pause for about 15 seconds every 10 seconds. This allows the solution to work through the internal components effectively.
Continue Until Empty
- Keep running the descaling solution through the machine until the water tank is empty. You’re ensuring that the solution reaches every nook and cranny.
Rinse with Clean Water
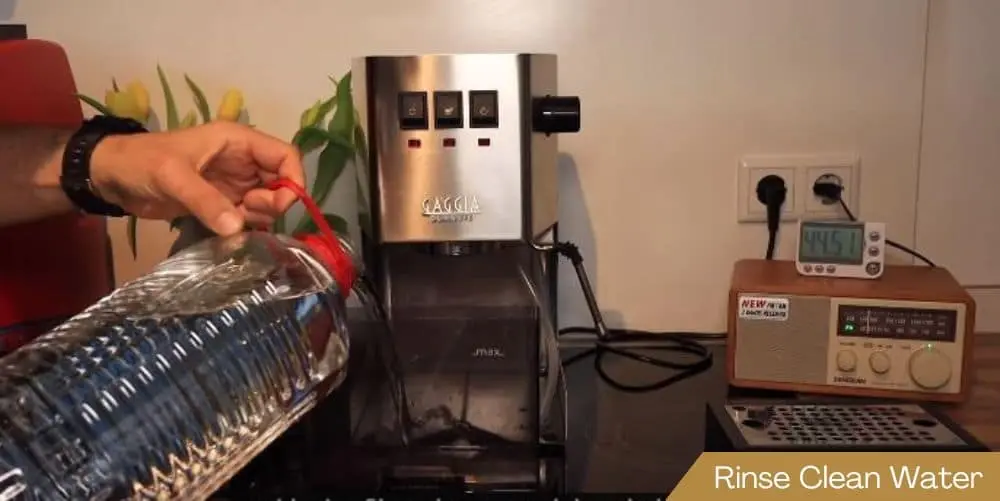
- Once the descaling solution has flowed through, remove the water tank, rinse it thoroughly, and fill it with fresh, clean water.
- Run this clean water through the machine in the same way you did with the descaling solution. This final rinse ensures all traces of the descaling solution are washed away.
Final Steps
- Remove and empty the drip tray and clean it to maintain cleanliness.
- Wipe down the exterior of your Gaggia Classic Pro and all removable parts.
- Reattach the drip tray and water tank, and your Gaggia Classic Pro is now ready to brew impeccable shots of espresso once again.
How Often to Descale Gaggia Classic Pro
The frequency of descaling depends on a couple of key factors. One major player in this equation is the hardness of your water. Water hardness can vary greatly depending on where you live. Hard water has a high mineral content, primarily calcium and magnesium, which can lead to faster limescale buildup.
If you’re in an area with hard water, you’ll need to descale your machine more frequently. As a general guideline, plan for descaling every two to three months in such regions.
On the other hand, if you’re fortunate enough to enjoy the benefits of soft water, you can stretch your descaling intervals a bit further. Soft water has fewer minerals, which means slower limescale buildup.
In these areas, you can typically descale your Gaggia Classic Pro every four to six months. However, these are rough estimates, and it’s essential to monitor your machine’s performance and be attentive to any signs that it needs descaling sooner.
Consistency is key in maintaining your espresso machine, so be sure to stick to a regular schedule that suits your specific water conditions.
Don’t forget that maintaining a schedule for descaling is not just about preventing issues; it’s also about preserving the taste and quality of your espresso. With the right maintenance routine, you’ll continue to brew exceptional shots that showcase the full potential of your Gaggia Classic Pro.
The Concise Way to Descale the Gaggia Classic Pro:
Maintaining Your Gaggia Classic Pro
To keep your espresso machine in peak condition and your coffee consistently remarkable, consider these additional aspects of maintenance:
1. Regular Cleaning: In the hustle and bustle of daily life, it’s easy to overlook the importance of regular cleaning. Don’t make that mistake! Wipe down your machine’s exterior daily to keep it looking its best. Also, pay attention to the drip tray, the water reservoir, and the portafilter. A clean machine is not only more aesthetically pleasing but also less likely to have limescale issues.
2. Backflushing: Backflushing is a method used to clean the internal components of your espresso machine, particularly the group head. It removes coffee oils and residue that can accumulate over time. Backflushing helps maintain consistent shot quality and prevents blockages. Depending on your machine, you may need a blind filter basket for this process.
3. Checking for Wear and Tear: Just like any piece of machinery, your Gaggia Classic Pro can experience wear and tear over time. Check your machine for any visible signs of deterioration in parts like the portafilter gasket, shower screen, and water dispersion disc. These are relatively easy and affordable components to replace, but ignoring them can lead to performance issues.
4. Manufacturer’s Recommendations: Don’t forget to consult your machine’s manual for specific recommendations from the manufacturer. They often provide valuable insights into how to care for your espresso machine, and following their advice can help extend its lifespan.
5. Consistency: Consistency is key in maintenance. Whether it’s cleaning, backflushing, or descaling, sticking to a regular schedule ensures that your Gaggia Classic Pro continues to deliver impeccable shots. Develop a routine that works for you, and your machine will thank you with consistently exceptional coffee.
you’re not only prolonging the life of your Gaggia Classic Pro but also ensuring that every cup of coffee you brew is a delight. Your machine is your partner on your coffee journey, and like any partnership, it thrives when it receives the care and attention it deserves.
Conclusion
Regular descaling is a small yet significant step in maintaining your Gaggia Classic Pro and ensuring it continues to produce exceptional espresso. By incorporating this simple maintenance task into your routine, you’ll not only protect your investment but also savor the full potential of your espresso machine with every cup.
So, gear up, coffee aficionados, and keep those Gaggia Classic Pro machines in prime condition for the perfect espresso experience!