Keurig K-Cafe Frother Keeps Beeping? Here’s What You Need to Know

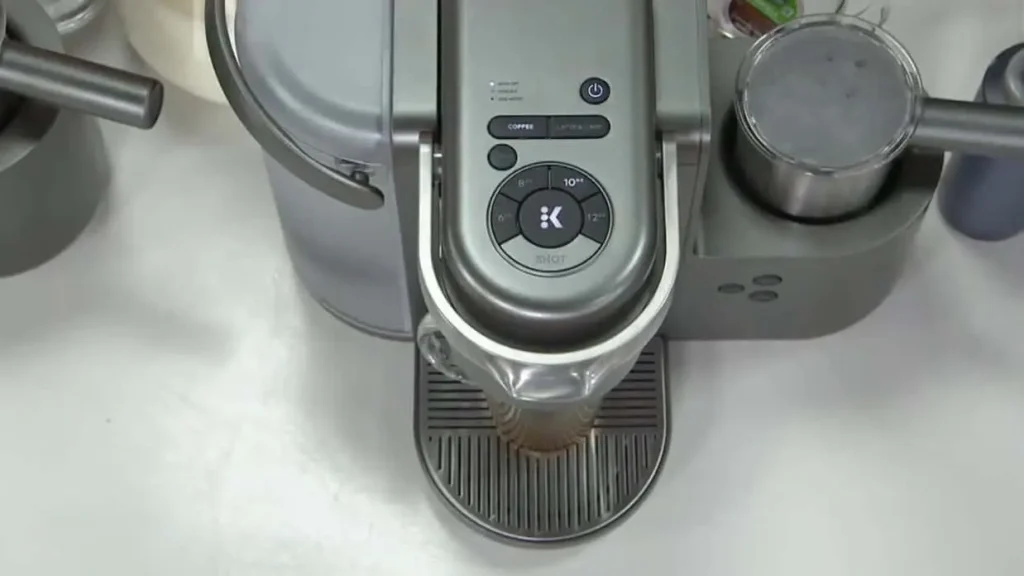
The Keurig K-Cafe is a popular choice among coffee lovers for its ability to brew a variety of coffee drinks, including lattes and cappuccinos, thanks to its built-in milk frother.
However, some users have reported an issue where the frother keeps beeping and refuses to function correctly. If you’re facing this problem, don’t worry—here’s a comprehensive guide to help you understand why this happens and how to fix it.
Common Reasons for the Beeping Frother
Incorrect Assembly:
Ensure that all parts of the frother, including the whisk, are properly assembled and securely placed. A misalignment or loose part can trigger the beeping.
Overheating:
If the frother has been used multiple times in a row, it may overheat and start beeping as a safety measure. Allow it to cool down for a few minutes before trying again.
Insufficient Liquid:
The frother might beep if there’s not enough milk or liquid inside. Ensure you’ve filled it at least to the minimum fill line marked on the frother cup.
Obstructions or Dirt:
Residue or blockages inside the frother or on the whisk can cause it to malfunction. Clean the frother thoroughly, ensuring there’s no milk residue.
Power Issues:
Check if the frother is properly plugged into the power source. Faulty power connections or interruptions can cause the device to beep.
Mechanical Issues:
Internal mechanical problems can also cause beeping. This could be due to wear and tear or a manufacturing defect.
Recommended Read: Keurig K Cafe Frother Not Working? Let’s Fix!
Troubleshooting Steps
Now that we have identified the potential reasons behind the beeping issue with your Keurig K-Cafe frother, it’s time to tackle each problem head-on. Here are step-by-step troubleshooting instructions to help you resolve the beeping issue and get your frother back to its optimal functioning:
1. Check the Assembly
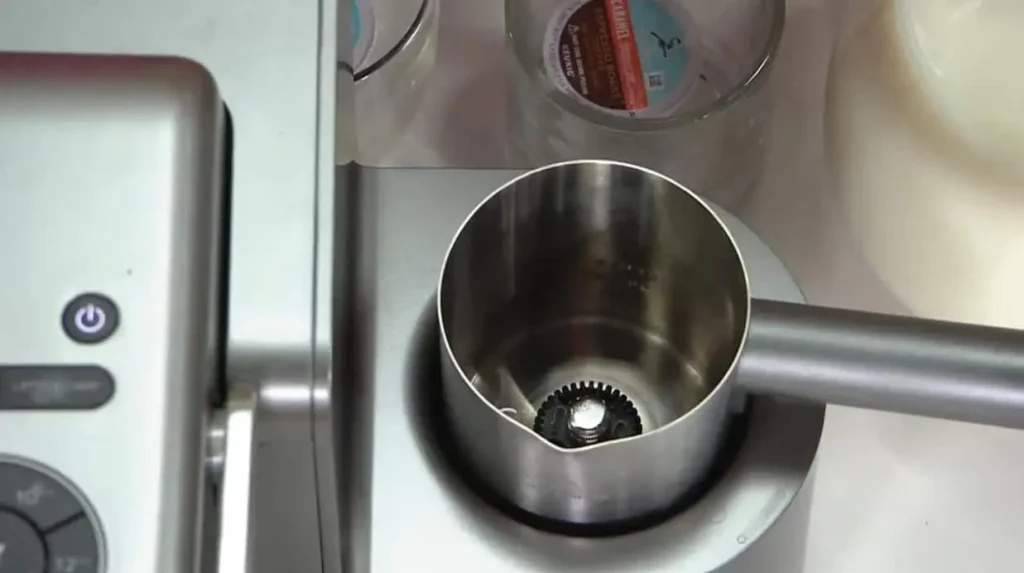
Frother Cup Placement:
Ensure that the frother cup is seated properly on its base. There should be no wobbling or misalignment. The contacts on the bottom of the frother cup must align correctly with the contacts on the base unit for the frother to operate.
Whisk Attachment:
Verify that the whisk is securely attached to the frother cup. The whisk should click into place and spin freely without obstruction.
2. Allow Cooling Time
Overuse Cooling:
It may overheat if you’ve used the frother multiple times in quick succession. Turn off the frother and unplug it. Let it rest for 5-10 minutes to cool down before using it again.
Routine Breaks:
Incorporate short breaks between each use to prevent the frother from overheating.
3. Ensure Adequate Liquid
Minimum Fill Line:
Ensure that the amount of milk or liquid in the frother cup meets or exceeds the minimum fill line. Not enough liquid can cause the frother to beep.
Maximum Fill Line:
Do not overfill the frother cup beyond the maximum fill line as this can also cause issues, including spillage and malfunction.
4. Thorough Cleaning
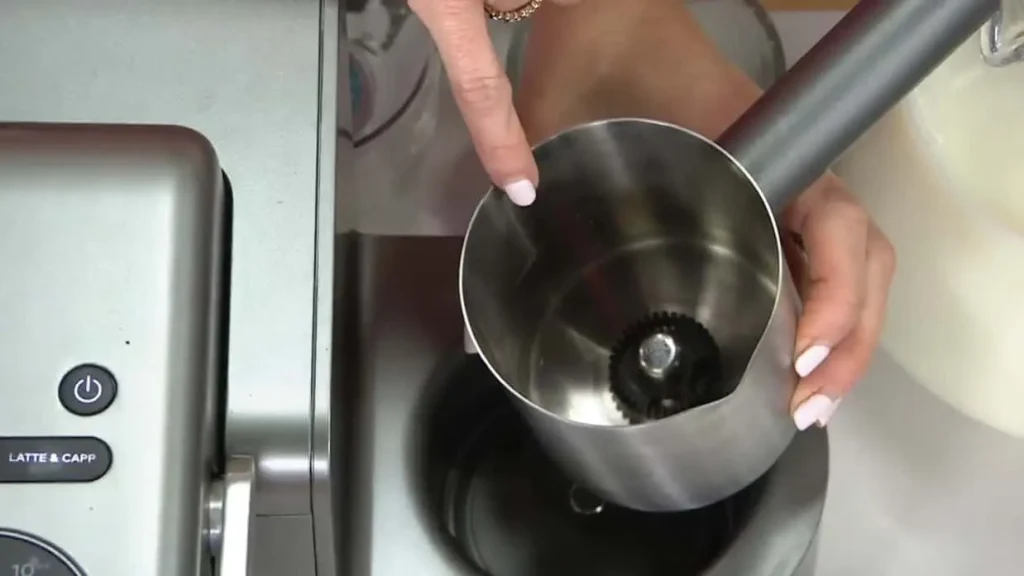
Disassemble the Frother:
Remove the frother cup and whisk. Clean each part separately.
Cleaning the Whisk:
Pay particular attention to the whisk, as milk residue can accumulate and cause blockages. Use warm, soapy water to clean it thoroughly, ensuring there are no residues left.
Cleaning the Frother Cup:
Clean the inside of the frother cup with warm, soapy water. Make sure to rinse it thoroughly to remove any soap residue.
Drying:
Ensure all parts are completely dry before reassembling. Moisture can cause issues with the electronic components.
5. Verify Power Connection
Check the Plug:
Confirm that the power cord is firmly plugged into the outlet. Sometimes, a loose connection can cause intermittent power issues.
Test the Outlet:
Plug another appliance into the same outlet to ensure it is working properly. If the outlet is faulty, try using a different one.
Power Cycle:
Unplug the frother, wait for about a minute, then plug it back in. This can reset the unit and potentially resolve the beeping issue.
6. Reset the Frother
Simple Reset:
Unplug the frother from the power source. Wait for about one minute. Plug the frother back in and attempt to use it again. This reset can clear any temporary glitches in the system.
7. Inspect for Damage
Check for Visible Damage:
Examine the frother, power cord, and base for any signs of physical damage, such as cracks, frayed wires, or burnt marks.
Assess for Internal Damage:
It may require professional assessment or repair if you suspect internal damage (e.g., if the frother was dropped or subjected to moisture).
Manufacturer’s Warranty:
If your frother is still under warranty, contact Keurig customer support. They may provide a repair or replacement based on the warranty terms.
8. Low Water Level
Checking the Water Reservoir:
Start by ensuring that the water reservoir of your Keurig K-Cafe frother is properly filled. Lift the lid of the frother and visually inspect the water level. If it’s below the minimum fill line, it’s likely the cause of the beeping. Carefully add water to the reservoir until it reaches the recommended level.
Resetting the Frother:
Sometimes, resetting the frother can resolve the beeping issue caused by low water levels. Turn off the frother by pressing the power button, and unplug it from the power source. Leave it unplugged for a few seconds before plugging it back in and turning it on again. The frother will recalibrate and may resume normal operation without beeping.
Verifying the Water Level Sensor:
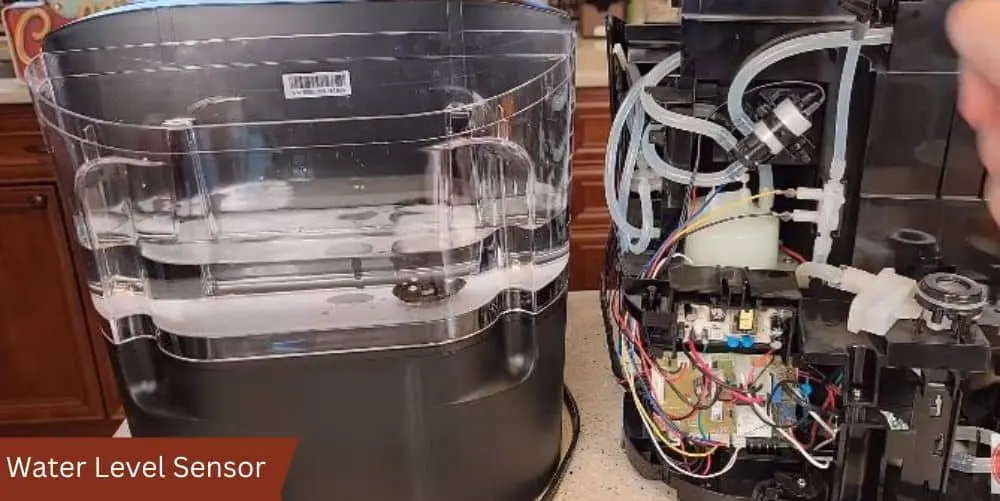
If the beeping persists despite having sufficient water in the reservoir, there might be an issue with the water level sensor. Carefully remove the water reservoir and inspect the sensor area for any debris or blockage. Clean the sensor and its surrounding area using a soft cloth or a cotton swab. Once cleaned, reinsert the reservoir and check if the beeping has stopped.
9. Clogged or Dirty Frother Nozzle
Disassembling the Frother:
Before cleaning the frother nozzle, make sure the frother is turned off and unplugged from the power source. Gently detach the frother lid and remove the whisk assembly by twisting it counterclockwise. This will allow you to access the frother nozzle for cleaning.
Cleaning the Frother Nozzle:
Prepare a mixture of warm water and a mild detergent. Dip a clean cloth or sponge into the soapy water and gently wipe the frother nozzle, removing any milk residue or buildup. Be thorough in cleaning the nozzle and its surrounding area. Rinse the nozzle with clean water and ensure there is no soapy residue left. Allow the nozzle to air dry completely before reassembling the frother.
If your Keurig K-Cafe Frother Lights Flashing? Read this.
Preventive Measures
Resolving the beeping issue with your Keurig K-Cafe frother is just the first step. To ensure a consistently smooth and enjoyable frothing experience, it’s essential to implement preventive measures. By incorporating these practices into your routine, you can minimize the chances of encountering the beeping problem in the future. Here are some preventive measures to consider:
Regular Cleaning and Maintenance:
Keeping your Keurig K-Cafe frother clean is crucial for its optimal performance. After each use, rinse the frother nozzle with warm water to remove any milk residue. It’s also recommended to clean the frother thoroughly at least once a week using a mild detergent. Regular maintenance will prevent clogs and ensure smooth operation, reducing the likelihood of beeping issues.
Proper Water Level:
Pay close attention to the water level in the frother’s reservoir. Before each use, check that the water level is above the minimum fill line to avoid triggering the beeping alert. This simple practice will not only prevent beeping issues but also ensure consistent frothing results.
Gentle Handling:
Handle your Keurig K-Cafe frother with care. Avoid forcefully inserting or removing the whisk assembly, as this can cause damage to the frother and potentially lead to operational issues. Follow the instructions provided in the user manual for proper handling techniques to maintain the longevity of your frother.
Avoiding Excessive Milk Residue:
Minimize the amount of milk residue left in the frother after each use. This can be achieved by using the appropriate amount of milk for frothing and avoiding overfilling the frother’s container. Excessive milk residue can clog the nozzle and impact the frother’s functionality, resulting in beeping problems.
Regular Inspections:
Periodically inspect your Keurig K-Cafe frother for any signs of wear or damage. Check the power cord, buttons, and overall condition of the frother.
When to Contact Customer Support?
If you’ve tried all the troubleshooting steps and your frother is still beeping, it might be time to reach out to Keurig’s customer support. They can provide further assistance, and if your frother is still under warranty, they may offer a repair or replacement.
Conclusion
A beeping Keurig K-Cafe frother can be frustrating, but it’s often a minor issue that can be resolved with some basic troubleshooting. By understanding the common causes and knowing how to address them, you can ensure your frother works smoothly and continues to help you create delicious coffee drinks at home. Happy brewing!