Keurig K-Cafe Troubleshooting: Common Issues and Quick Fixes

Are you the proud owner of a Keurig K-Cafe coffee maker? If so, you’re in good company! The Keurig K-Cafe has gained tremendous popularity among coffee enthusiasts for its convenience and versatility in brewing delicious beverages. However, like any complex appliance, it’s not uncommon to encounter occasional hiccups along the way. That’s where troubleshooting comes in.
Troubleshooting your Keurig K-Cafe is an essential skill to ensure a seamless and satisfying coffee experience. Whether you’re dealing with power issues, brewing inconsistencies, frother malfunctions, or any other problem, understanding common issues and their quick fixes can save you time and frustration.
Getting Started with Troubleshooting
Before diving into the world of Keurig K-Cafe troubleshooting, it’s important to familiarize yourself with a few essential steps to ensure a smooth and effective troubleshooting process. These steps will help you get started and set the foundation for resolving any issues you encounter.
Importance of Regular Maintenance and Cleaning
Just like any precision machine, your Keurig K-Cafe requires regular maintenance and cleaning to keep it in optimal working condition. Neglecting this aspect can lead to performance problems and affect the taste and quality of your coffee.
To start, make sure you follow the manufacturer’s guidelines for cleaning and maintenance. These guidelines usually include recommended cleaning frequencies, descaling procedures, and other maintenance tasks specific to your Keurig K-Cafe model.
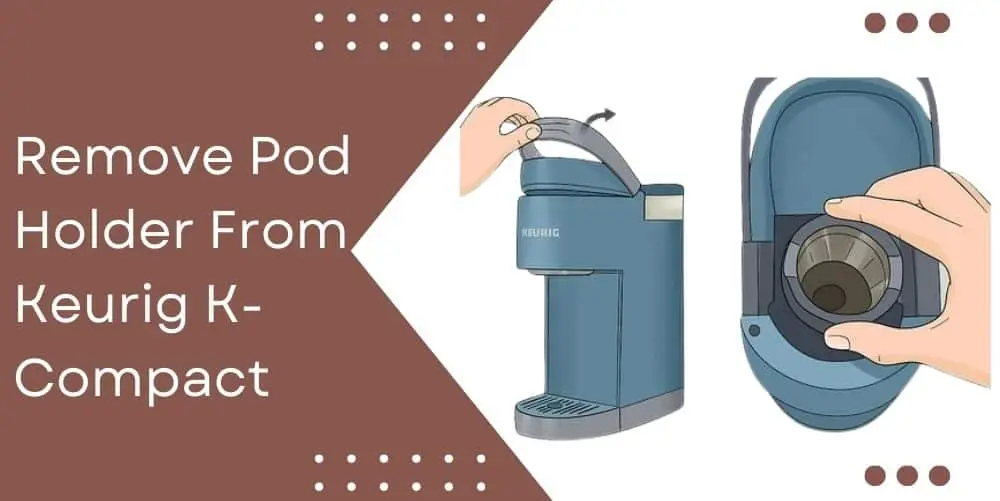
Regular cleaning involves removing any coffee residues, mineral deposits, or impurities that can accumulate over time. Cleaning the brewer’s components, such as the K-Cup holder and the water reservoir, helps prevent clogs and ensures smooth operation.
Descaling is another crucial aspect of maintenance, especially if you live in an area with hard water. Over time, mineral deposits can build up inside the machine, affecting its performance and reducing the lifespan of various components. Descaling involves removing these deposits and restoring the proper flow of water.
Safety Precautions to Keep in Mind While Troubleshooting
While troubleshooting your Keurig K-Cafe, it’s important to prioritize safety to prevent any accidents or damage to yourself or the machine. Here are some safety precautions to keep in mind:
Unplug the Machine: Before starting any troubleshooting procedures, always unplug the Keurig K-Cafe from the power source. This prevents electrical hazards and ensures your safety during the troubleshooting process.
Allow the Machine to Cool Down: Hot surfaces can cause burns or other injuries. If the coffee maker has been recently used, give it sufficient time to cool down before touching any components or attempting to troubleshoot.
Read the User Manual: The user manual provided by Keurig contains valuable information about troubleshooting specific to your model. Take the time to review the manual before starting any troubleshooting procedures to familiarize yourself with the machine’s features and potential issues.
Use Proper Tools: When troubleshooting, use the appropriate tools recommended by the manufacturer. This ensures that you don’t inadvertently cause damage to the machine or compromise its functionality.
Common Issues with the Keurig K-Cafe
Even with its reputation for excellence, the Keurig K-Cafe can encounter a few common issues that can impact your coffee brewing experience. Understanding these issues and their potential causes is the first step toward effective troubleshooting. Let’s explore some of the most frequently encountered problems:
Machine Not Powering On or Displaying Error Messages
One of the frustrating issues you may encounter with your Keurig K-Cafe is when it fails to power on or displays error messages. Here are some possible causes and troubleshooting steps:
Check the Power Connection: Ensure that the coffee maker is properly plugged into a working electrical outlet. Verify that the outlet itself is functioning correctly by testing it with another device.
Reset the Machine: Sometimes, a simple reset can resolve power-related issues. Unplug the machine, wait for a few minutes, and then plug it back in. This can help reset any minor glitches in the system.
Inspect the Power Cord: Examine the power cord for any damage or frayed wires. If you find any issues, it’s important to replace the cord to ensure safe operation.
Brewing Problems
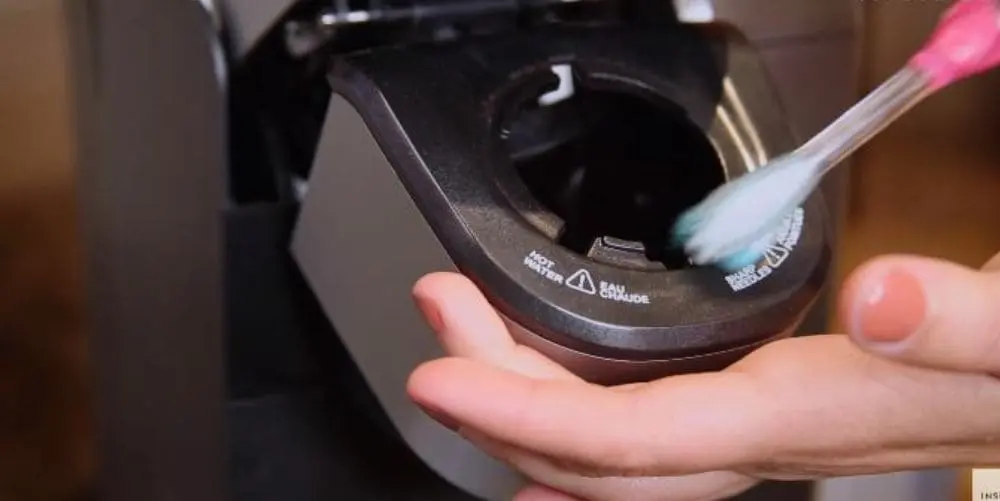
Inconsistent or Weak Coffee Output: If your coffee tastes weak or comes out inconsistently, the issue could be related to the brewing process. Ensure that you’re using the appropriate coffee strength setting, and check that the water reservoir is filled to the recommended level. Additionally, consider cleaning the brewer’s needles to remove any clogs that might be obstructing the water flow.
Coffee Grounds in the Cup: Finding coffee grounds in your cup can be unpleasant. This issue often occurs when the K-Cup holder isn’t properly seated or if the foil lid of the K-Cup is pierced incorrectly. Ensure that the K-Cup is placed securely in the holder, and double-check that the foil lid is intact before brewing.
Coffee Not Dispensing at All: If your Keurig K-Cafe isn’t dispensing any coffee, it might be due to a clog in the machine’s internal system. Cleaning the needles and ensuring the water reservoir is properly filled can often resolve this issue. If the problem persists, further troubleshooting or professional assistance may be required.
Frother-Related Issues
Milk Not Frothing Properly or Producing Excessive Foam: If your milk isn’t frothing as expected or is producing too much foam, it could be due to incorrect settings or the milk not being cold enough. Make sure you’re using the appropriate frothing setting and that the milk is chilled before frothing.
Frother Not Working at All: If the frother is not working, check that it’s properly attached to the machine and that the frother lid is securely closed. Additionally, inspect the frother whisk for any blockages and clean it if necessary.
Recommended: Keurig K-Cafe Frother Lights Flashing
Quick Fixes and Troubleshooting Tips
When facing issues with your Keurig K-Cafe, quick fixes and troubleshooting tips can often save the day. Let’s explore some practical steps you can take to address common problems and get your coffee maker back on track.
Resetting the Machine to Factory Settings
If you’re experiencing persistent issues with your Keurig K-Cafe, a simple reset to factory settings can sometimes resolve the problem. Follow these steps to perform a reset:
- Ensure the machine is powered on and plugged in.
- Locate the “Menu” button on the control panel and press it.
- Use the arrow keys to navigate through the menu options until you find “Settings” or “Maintenance.”
- Select the “Settings” or “Maintenance” option, and then choose “Restore Factory Settings” or a similar option.
- Confirm the reset by following the prompts on the display.
- Performing a factory reset can help clear any stored settings or temporary glitches that may be causing issues.
Proper Cleaning and Descaling Procedures
Regular cleaning and descaling are vital for the optimal performance of your Keurig K-Cafe. Follow these cleaning and descaling procedures to keep your machine in top shape:
Cleaning the K-Cup Holder: Remove the K-Cup holder assembly and rinse it thoroughly under running water. Use a non-abrasive cloth or brush to remove any coffee residue or debris.
Cleaning the Water Reservoir: Remove the water reservoir from the machine and empty any remaining water. Wash the reservoir with warm, soapy water, rinse it thoroughly, and allow it to air dry.
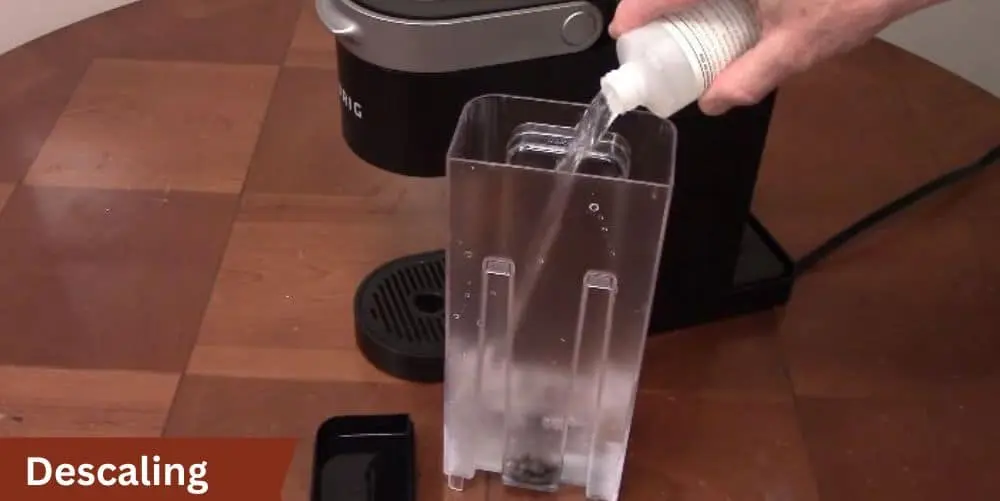
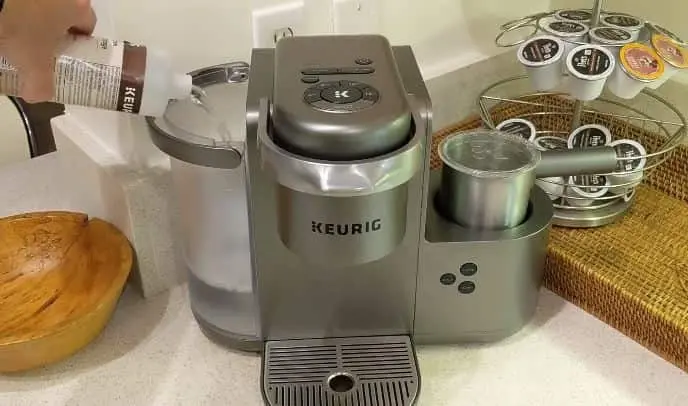
Descaling the Machine: Descaling removes mineral deposits that can accumulate over time. Follow the manufacturer’s instructions and use a descaling solution specifically designed for coffee makers. Run the descaling solution through the brewing cycle, and then rinse the machine by running multiple cycles with clean water.
Regular cleaning and descaling help prevent clogs, improve coffee quality, and maintain the longevity of your Keurig K-Cafe.
Checking and Troubleshooting Power Supply and Connections
If your Keurig K-Cafe is experiencing power-related issues, these troubleshooting steps can help:
Check the Power Outlet: Ensure that the power outlet is functioning correctly by plugging in another device and confirming that it powers on.
Inspect the Power Cord: Examine the power cord for any signs of damage or fraying. If you notice any issues, replace the cord to ensure safe operation.
Resetting the Circuit Breaker: If the machine is not receiving power, check the circuit breaker in your home or office. Reset the circuit breaker if necessary.
Examining and Troubleshooting the Water Reservoir and Water Lines
Water-related issues can impact the brewing process. Consider the following troubleshooting tips:
Water Reservoir: Ensure that the water reservoir is filled to the recommended level. Check for any cracks or damage that may cause leaks. If necessary, replace the reservoir.
Water Lines: Inspect the water lines for any kinks, twists, or clogs. Use a straightened paperclip or a pipe cleaner to clear any obstructions gently.
Addressing Specific Brewing and Frothing Issues
For specific brewing and frothing issues, try these troubleshooting tips:

Weak Coffee: Adjust the coffee strength setting to a higher level, and ensure that the water reservoir is filled adequately.
Coffee Grounds in the Cup: Check that the K-Cup is properly seated and that the foil
Advanced Troubleshooting and Professional Assistance
In some cases, advanced troubleshooting may be required to resolve persistent issues with your Keurig K-Cafe. If you’ve tried the quick fixes and troubleshooting tips mentioned earlier without success, it may be time to explore additional options. Here are some advanced troubleshooting steps and considerations:
Contact Keurig Customer Support
If you’re unable to resolve the issue on your own, don’t hesitate to reach out to Keurig’s customer support. They have dedicated representatives who can provide further assistance and guidance based on the specific problem you’re facing. You can typically find the contact information for customer support on the Keurig website or in the user manual that came with your K-Cafe.
When contacting customer support, be prepared to provide them with details about the issue, any troubleshooting steps you’ve already taken, and your machine’s model and serial number. This information will help them understand the problem better and provide appropriate solutions.
Consider Professional Repair Services
If your Keurig K-Cafe is still experiencing issues even after attempting advanced troubleshooting, you may need to consider professional repair services. Keurig offers authorized service centers or technicians who specialize in repairing their coffee makers. Reach out to Keurig or visit their website to find a list of authorized repair service providers in your area.
Before opting for professional repair, evaluate the cost of repair compared to the price of a new machine. Depending on the age and extent of the issue, it might be more cost-effective to replace your Keurig K-Cafe with a new unit.
Warranty Coverage
If your Keurig K-Cafe is still within the warranty period, check the warranty coverage provided by Keurig. The warranty typically covers manufacturing defects and certain malfunctions. If the issue you’re experiencing is covered by the warranty, Keurig may repair or replace your machine free of charge. Be sure to have your purchase receipt and warranty information readily available when contacting customer support or arranging for repairs.
Upgrading to a Newer Model
If your Keurig K-Cafe is an older model and you’ve exhausted all troubleshooting options, it may be worth considering an upgrade to a newer model. Keurig continually introduces new and improved coffee makers with enhanced features and performance. Research the latest models and determine if upgrading to a new Keurig machine is a viable solution for you.
Preventive Measures and Maintenance Tips
To keep your Keurig K-Cafe running smoothly and minimize the likelihood of encountering issues in the future, implementing preventive measures and following proper maintenance practices is crucial. Here are some preventive measures and maintenance tips to consider:
Regular Cleaning Routine
Maintaining a regular cleaning routine is essential for the longevity and optimal performance of your Keurig K-Cafe. Here are a few cleaning tasks to incorporate into your routine:
Clean the K-Cup Holder: Remove the K-Cup holder assembly and rinse it under running water. Use a soft cloth or brush to clean any residual coffee grounds or debris. Dry the holder thoroughly before reassembling it.
Clean the Water Reservoir: Regularly clean the water reservoir with warm, soapy water. Rinse it thoroughly to remove any soap residue, and allow it to air dry completely before refilling.
Clean the Exterior Surfaces: Wipe down the exterior surfaces of your Keurig K-Cafe regularly using a damp cloth. Avoid using abrasive cleaners that can damage the machine’s finish.
Descaling at Regular Intervals
Descaling is crucial to remove mineral deposits that can accumulate inside your Keurig K-Cafe over time. Follow these steps to descale your machine:
Prepare the Descaling Solution: Prepare the descaling solution according to the instructions provided. Usually, this involves mixing the solution with water in the water reservoir.
Run the Descaling Cycle: Place a large mug or container on the drip tray to collect the descaling solution. Start the descaling cycle as directed in the user manual. The machine will dispense the solution and pause periodically to allow it to work on removing mineral deposits.
Rinse the Machine: After the descaling cycle is complete, run multiple brewing cycles with clean water to thoroughly rinse the machine and remove any remaining descaling solution.
Use Filtered Water
Using filtered water in your Keurig K-Cafe can help reduce mineral deposits and extend the lifespan of the machine. If you live in an area with hard water, consider using filtered or bottled water to brew your coffee. This can help minimize the accumulation of minerals and improve the overall taste and quality of your coffee.
Replace Components as Needed
Over time, certain components of your Keurig K-Cafe may wear out or become less effective. To ensure optimal performance, regularly check and replace the following components as needed:
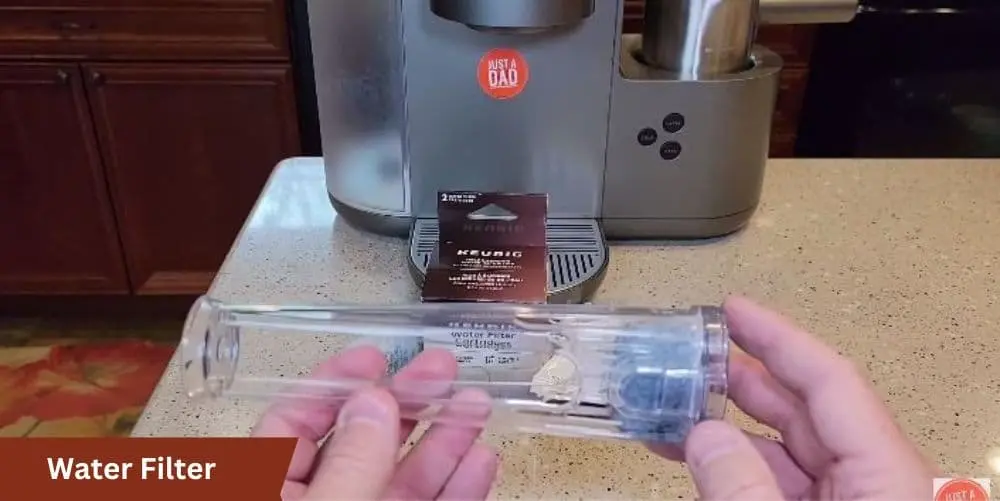
Water Filter: If your Keurig K-Cafe has a water filter, follow the manufacturer’s instructions on when and how to replace it. A worn-out water filter may affect the taste of your coffee and the overall performance of the machine.
Seals and Gaskets: Inspect the seals and gaskets in your Keurig K-Cafe for signs of wear or damage. If you notice any issues, contact Keurig or an authorized service center to obtain replacement parts and instructions for proper installation.
Conclusion
Troubleshooting issues with your Keurig K-Cafe can be frustrating, but with the right knowledge and approach, you can often resolve common problems and enjoy a seamless brewing experience. By understanding the potential issues, implementing the provided troubleshooting tips, and following preventive measures and maintenance practices, you can keep your Keurig K-Cafe running smoothly and extend its lifespan.