
Keurig K-Supreme Plus Not Brewing a Full Cup of Coffee

Welcome to the world of the Keurig K-Supreme Plus coffee maker! If you’re reading this article, chances are you’ve encountered a frustrating issue: your beloved Keurig K-Supreme Plus is not dispensing full cups of coffee. Fear not! We’re here to help you troubleshoot and fix this common problem so that you can once again savor the rich flavors and aromas of a perfectly brewed cup.
The Keurig K-Supreme Plus is known for its convenience and versatility, offering an array of beverage options at the touch of a button. However, when it fails to deliver a full cup of coffee, it can quickly put a damper on your morning routine or afternoon pick-me-up. But worry not, because we’ve got you covered with a comprehensive guide to address this issue head-on.
Before we dive into the troubleshooting steps, let’s take a moment to understand the potential causes behind the incomplete cup issue. One possible reason could be an insufficient water supply. It’s essential to ensure that your water reservoir is properly filled and that the water line connection is secure.
Another culprit could be clogged needles or coffee grounds that have found their way into the system. These can impede the flow of water, resulting in incomplete cup dispensing. Cleaning and unclogging the needles, as well as taking preventive measures to prevent coffee grounds from entering the system, can go a long way in resolving this issue.
Incorrect brewing settings may also contribute to the problem. Adjusting the brewing strength and cup size settings to match your preferences is crucial. We’ll explore these settings in detail and guide you on how to customize them to achieve your desired cup size and coffee strength.
Lastly, scale buildup and mineral deposits can hinder the performance of your Keurig K-Supreme Plus. Over time, these impurities accumulate, affecting the water flow and overall brewing experience. We’ll show you how to descale your machine properly, eliminating scale and deposits and restoring it to its optimal state.
Understanding the Potential Causes
Before we jump into troubleshooting, it’s important to grasp the potential causes behind your Keurig K-Supreme Plus not dispensing full cups. By identifying these factors, you’ll be better equipped to tackle the issue head-on. Let’s explore some common culprits:
Insufficient water supply: One possible reason for the incomplete cup issue is an inadequate water supply. Start by checking the water reservoir of your Keurig K-Supreme Plus. Ensure it is properly filled to the recommended level. A low water level can result in incomplete brewing. Additionally, examine the water line connection to ensure it’s securely attached. Any loose connections can lead to reduced water flow and, consequently, less coffee in your cup.
Clogged needles or coffee grounds in the system: Another culprit for incomplete cup dispensing could be clogged needles or coffee grounds finding their way into the machine. The needles in your Keurig K-Supreme Plus play a crucial role in puncturing the coffee pod and allowing water to flow through. Over time, these needles can become clogged, obstructing the proper water flow. Additionally, stray coffee grounds can accumulate in the system, further impeding the brewing process. We’ll delve into cleaning and unclogging the needles in detail later on, as well as provide tips to prevent coffee grounds from entering the system in the future.
Incorrect brewing settings: Sometimes, the issue may stem from incorrect brewing settings. The Keurig K-Supreme Plus offers various options to customize your coffee experience, including brewing strength and cup size settings. Ensure that these settings are adjusted according to your preferences. If the cup size setting is too low, for example, it may result in an incomplete cup. We’ll guide you through the process of adjusting these settings to achieve your desired cup size and coffee strength.
Scale buildup and mineral deposits: Over time, mineral deposits and scale can accumulate in your Keurig K-Supreme Plus, particularly if you live in an area with hard water. These deposits can block the water flow, leading to incomplete cup dispensing. Understanding how scale buildup occurs and learning how to descale your machine effectively will be key in resolving this issue. We’ll provide a detailed descaling process later on to help you eliminate these impurities and restore your Keurig K-Supreme Plus to its optimal performance.
Troubleshooting and Solutions
Step-by-step troubleshooting guide
When faced with the issue of the Keurig K-Supreme Plus not dispensing full cups, it’s important to follow a systematic approach to identify and resolve the problem.
Verify the power source and connection: Ensure that your coffee maker is properly plugged into a functioning power outlet. Check the power cord for any damages or loose connections.
Proper placement of the coffee pod: Double-check that the coffee pod is correctly positioned in the brew chamber. Ensure it is fully inserted and aligned with the puncture needle.
Check for leaks or blockages: Inspect the machine for any visible leaks or blockages that may be affecting the water flow. Look for any cracks or damages in the water reservoir, drip tray, or other components.
Priming the coffee maker
Priming the Keurig K-Supreme Plus can help resolve any air bubbles or irregularities in the water flow. Follow these steps to prime your coffee maker:
Fill the water reservoir: Ensure that the water reservoir is properly filled with clean water.
Power on the machine: Turn on the Keurig K-Supreme Plus and allow it to heat up.
Place a mug: Position an empty mug on the drip tray beneath the brew head.
Start priming: Select the largest cup size and initiate a brewing cycle without inserting a coffee pod. Let the machine dispense hot water into the mug.
Repeat the process: Repeat the priming process a few times to ensure thorough water circulation and the removal of any air bubbles.
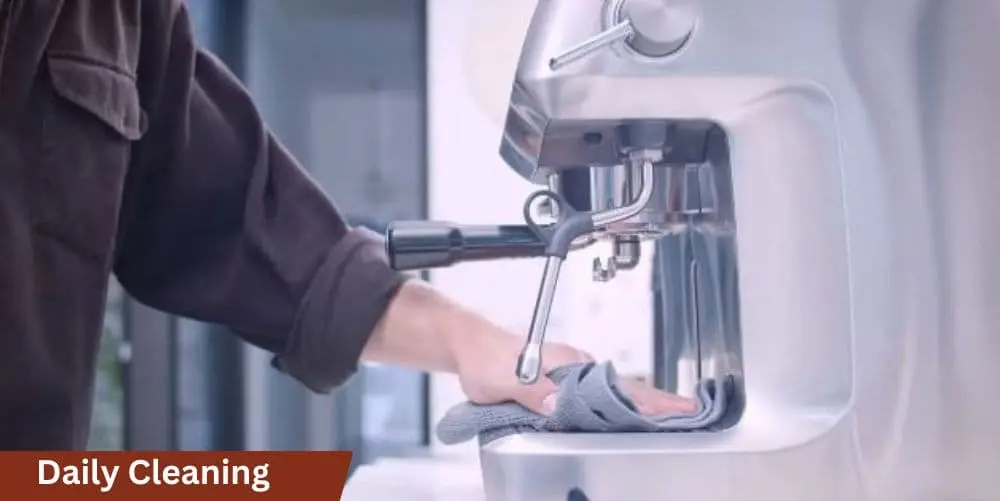
Cleaning and descaling
Regular cleaning is essential for the optimal performance of your Keurig K-Supreme Plus. Follow these cleaning steps to address potential clogs and buildup:
External cleaning: Wipe the external surfaces of the machine with a damp cloth. Pay special attention to the area around the puncture needle and the exit needle.
Descaling process: Descaling helps remove mineral deposits and scale buildup. Consult your Keurig K-Supreme Plus manual for specific descaling instructions. Generally, the process involves creating a descaling solution with water and a descaling agent, running the solution through the machine, and thoroughly rinsing afterward.
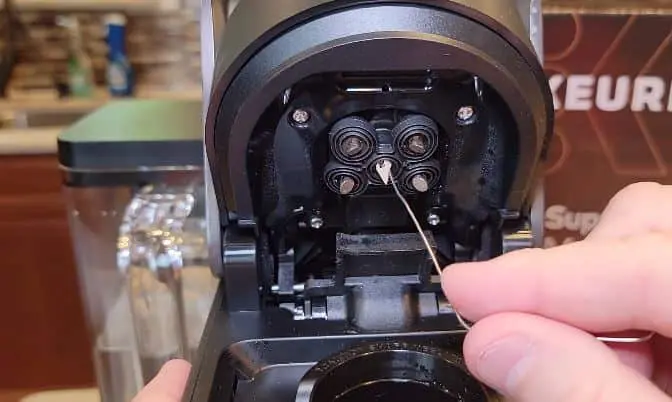
Needle maintenance
Clogged needles can impede water flow and result in incomplete brewing. To clean and maintain the needles:
Power off and unplug: Ensure that the machine is powered off and unplugged for safety.
Remove and clean the exit needle: Carefully remove the exit needle by following the instructions in your manual. Clean it with a soft brush or a paper clip to dislodge any debris.
Clean the puncture needle: Gently wipe the puncture needle with a damp cloth or use a needle cleaning tool if provided.
Reassemble and test: Once the needles are cleaned, reassemble the machine and perform a test brew to check if the issue has been resolved.
Adjusting brewing settings
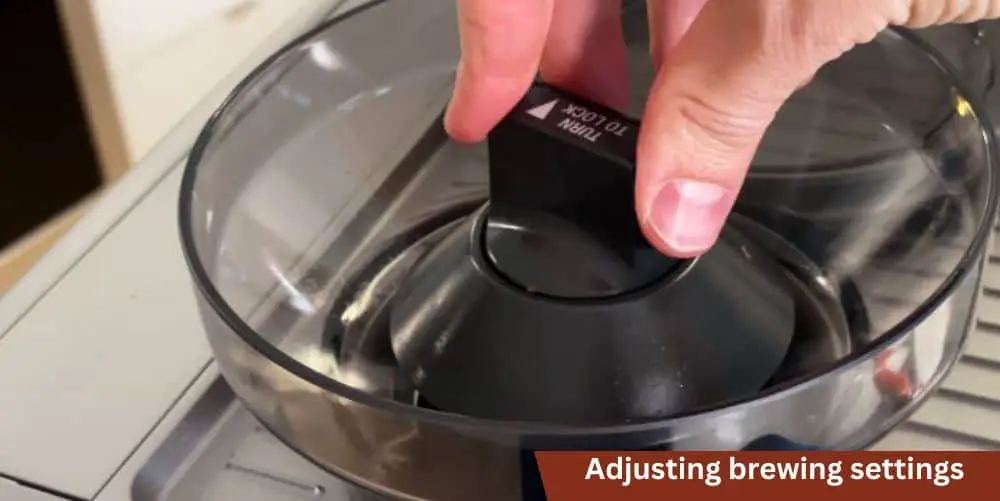
Incorrect brewing settings can lead to insufficient cup sizes. Follow these steps to adjust the brewing settings on your Keurig K-Supreme Plus:
Select your desired cup size: Use the control panel to choose the appropriate cup size for your preference. Ensure that you’ve selected a larger cup size for a full brew.
Preventive Measures and Maintenance
To ensure consistent performance and avoid future issues with your Keurig K-Supreme Plus, it’s important to follow preventive measures and establish a regular maintenance routine. Here are some key steps to consider:
Regular cleaning and maintenance routine
External cleaning: Wipe down the external surfaces of the machine regularly with a damp cloth. Pay attention to the drip tray, water reservoir, and brewing chamber.
Remove and clean removable parts: Take out removable components, such as the water reservoir, drip tray, and K-cup holder, and wash them with warm, soapy water. Rinse thoroughly and allow them to air dry before reassembling.
Descaling frequency: Regularly descale your Keurig K-Supreme Plus to remove mineral deposits and scale buildup. The frequency may vary depending on the hardness of your water and usage patterns. Refer to the manufacturer’s instructions or descaling guidelines in your manual.
Water quality considerations
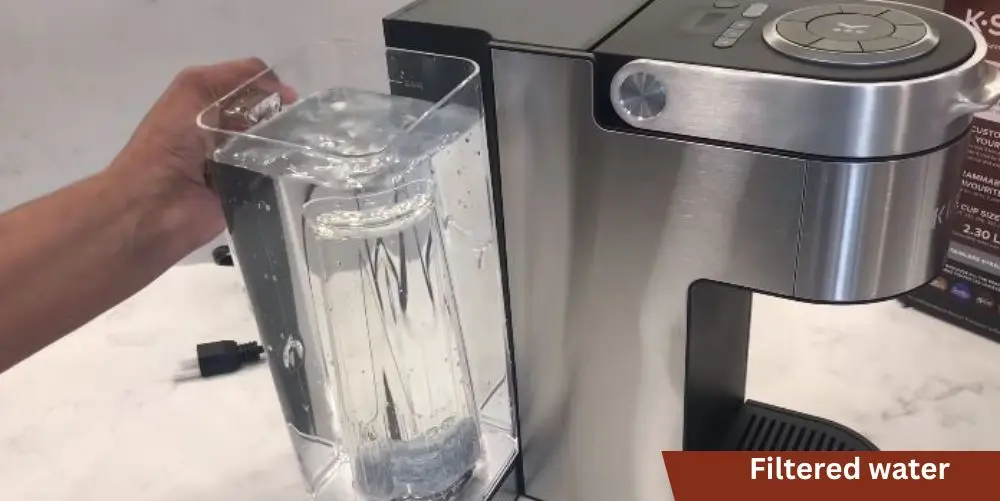
Filtered water: Consider using filtered water to brew your coffee. Filtered water helps reduce mineral content and improves the taste of your beverages while minimizing scale buildup in the machine.
Addressing hard water: If you have hard water, which is high in mineral content, consider using a water softening method or a water filter specifically designed to address hardness. This can help prevent scale buildup and prolong the lifespan of your Keurig K-Supreme Plus.
Proper storage and handling of coffee pods
Store coffee pods correctly: Keep your coffee pods in a cool, dry place, away from direct sunlight and moisture. This helps maintain their freshness and ensures optimal flavor when brewed.
Avoid introducing foreign objects: When inserting a coffee pod into the brew chamber, be cautious not to introduce any foreign objects that could obstruct the needles or disrupt the water flow. Ensure the pod is fully aligned with the puncture needle and properly seated.
Regular machine inspections
Check for leaks: Periodically inspect your Keurig K-Supreme Plus for any signs of leaks or drips. If you notice any leaks, promptly address them by examining the affected components, tightening connections, or seeking professional assistance if needed.
Monitor performance: Pay attention to the performance of your machine, including water flow, temperature, and cup sizes. If you notice any deviations or inconsistencies, take action to identify and resolve the underlying issues.
Conclusion
Congratulations! You’ve now become well-equipped to tackle the issue of your Keurig K-Supreme Plus not dispensing full cups. you can overcome the frustration and once again indulge in a satisfying cup of coffee.
we’ve explored the potential causes of the incomplete cup issue, including insufficient water supply, clogged needles or coffee grounds, incorrect brewing settings, and scale buildup. By understanding these factors, you’ve gained valuable insights into what may have been hindering your Keurig K-Supreme Plus performance.
Through the step-by-step troubleshooting guide, we’ve provided you with practical methods to identify and resolve the issue. From priming the coffee maker to cleaning and descaling, as well as maintaining the needles and adjusting brewing settings, you’ve learned how to address various aspects of the problem.
Furthermore, we’ve emphasized the importance of preventive measures and regular maintenance to prevent future issues. By incorporating a cleaning routine, using filtered water, properly storing coffee pods, and conducting regular machine inspections, you can ensure the longevity and optimal performance of your Keurig K-Supreme Plus.